Mexico and Public Bikeshares

Just got back from CDMX this week, had a blast with my bro-migo, Tony! We visited several neighborhoods, including Condesa, Roma, and Midtown, using Vezba’s public bikeshare. Vezba wasn’t our first option, but it was the one that worked. More detail below.

Mexico City has three public bikeshares. Despite what current blogs are telling you, Ecobici is not an option for those of you rocking a U.S. credit card and Ecobici’s app – when you attempt to set up an account it errors out – boo hiss!

There was also a public bikeshare sponsored by HSBC, which consisted of black bikes that were parked in docks. We didn’t see this public bikeshare until we arrived there, so I don’t know how to join it. Sorry, I wished I had taken a picture of their dock and instructions when I went by.

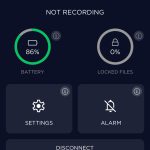
The only public bikeshare we exercised was Dezba. Their app has issues on iOS with different issues on Android, but overall it works for U.S. citizens holding a U.S. credit card. I was using their iOS app and when quitting a ride through the app it would seem to hang. To end your Dezba ride, just lock the back wheel (with the bike’s built in lock) and it will automatically end your ride. Force-quit Dezba’s iPhone app and re-open and you will find that this works to end your ride.

Notes, the bike share area isn’t very large. If you’re considering riding southeast to Cablebús Linea 2 or north to Cablebús Linea 1 you’ll have to stop and park your Vezba, otherwise you’ll pay a fee to park outside the zone. Another option if you insist on biking all the way, bring your own lock just pay the overage fees, the overage fees are much less than ending a ride outside the zone.

Ok, that’s all for now. I’ll try to post more comments and picks later.

Airport Pedestrian Adventures

For whatever odd reason, I like to unwind from a trip and, if accessible, walk to an airport terminal. I’ve now done this in Las Vegas, Minneapolis-St Paul, and San Diego.

Today I tried building to the list by walking/biking from JFK to La Guardia. From Terminal 8, I didn’t find a good way to walk straight out into Jamaica. For $8.25, I caught the AirTrain outside Terminal 8 and rode it to the Jamaica stop, which is where you must pay to exit. From there I began walking north, figuring I’d grab a Citi bike from their area north of JFK. After over an hour of walking I found a Citi bike and rode 25 minutes to a Dunkin’ Donuts for a late breakfast. From there I walked into La Guardia by walking up 82nd St to Marine Terminal Rd only to find a sign preventing pedestrian access to Terminals B and C. I decided to hop on the free shuttle bus to reach my destination, Terminal B. I understand if I had entered LGA from 94th, I could’ve walked all the way in, next time! JFK on the other hand is a bit disappointing, surely there’s a way to do it sans AirTrain?

Chamberlain and ratgdo

When our garage was rebuilt in 2017 a Chamberlain 8550WL belt-driven garage door opener was installed. We love how quiet it is, that it has a battery backup, and that it could be paired to a homebridge and operated with HomeKit, at least until September 2023 when Chamberlain closed access to third party plugins.

Enter Paul Whelan and ratgdo. Paul reverse engineered the encryption that Chamberlain has on these openers and made a board that has been open-sourced by others – for a good interview with Paul, check out this video. I bought Paul’s board, coded it with the ratgdo homebridge web installer, wired it to our Chamberlain garage door opener with an external power supply, and it worked flawlessly until I swapped out our Apple TV 4K for the latest Apple TV 4K that does Thread and Matter. Here’s an example of what the wiring looks like when the ratgdo is connected to the Chamberlain opener and here’s an example of pulling 3.3 volts from the 8550WL to power the ratgdo – I haven’t tried the latter, but likely will this spring/summer when it is warmer in the garage.

A few gotchas… Google Chrome or Microsoft Edge are required to transmit the ratgdo’s firmware to its board. Changing the user agent does nothing to help Safari communicate to the ratgdo through the web installer.

macOS and OCR

Infrequently I come across old pdf files with pages that contain text as a single static image and lack searchable text. I’ve wanted an easy and free OCR solution and I’ve now found it, although I’ll keep looking for an open source option that is just as easy to use. For now, my Mac is rocking OwlOCR and it offers right-click contextual menu access to making searchable pdf’s without paying for it (for now), here’s how:

  1. Download OwlOCR through the App Store app on your Mac.
  2. Enable OwlOCR’s Finder Extensions using these instructions beginning with the section “Enabling Finder Extensions in MacOS”

When you have a .pdf in the Finder that you want to make searchable, right-click the .pdf’s icon, choose “Quick Actions->Create Searchable PDF” and wait until a status window indicates that it is done. Thanks OwlOCR team!

Basic Photos Backup

Once a year, we back up Tina’s Photos library to an external hard drive and deliver it to friends who keep it at their house, just in case ours burns down or something terrible. For whatever reason, it seems we can’t just drag her “Photos Library.photoslibrary” to an external hard drive or at least when we do, it seemingly spins forever without a good status updated. In steps rsync.

From Terminal.app, I pasted in the following command on her MacBook Pro while the backup drive is plugged in and this seems to do the trick with a live status update spewing in Terminal’s window.

sudo rsync --archive --stats --human-readable --progress /Users/christinaschwie/Pictures/Photos\ Library.photoslibrary /Volumes/Tina\ Photos/Photos\ Library.photoslibrary

I should’ve published this as a tip for others. And even if you’re not syncing a 250+ GB photo library like this scenario, hopefully it helps you with your large directory transfer needs.

** UPDATE 2-15-2024 **

Resource forks may have been damaged using the above command. Next time, try it with “–hfs-mode=appledouble”, such as:

sudo rsync --archive --stats --hfs-mode=appledouble --human-readable --progress /Users/christinaschwie/Pictures/Photos\ Library.photoslibrary /Volumes/Tina\ Photos/Photos\ Library.photoslibrary

Or install rsync with brew and then add –xattr to the command.

Or sudo rsync -xrlptgoXvHS --progress --delete --fileflags / /Volumes/BackupClone using tips here.

** UPDATE 11-11-2024 **

This is the command I ended up executing that works great:

rsync -Pha –delete –stats /Users/christinaschwie/Pictures/Photos\ Library.photoslibrary/ /Volumes/Tina\ Photos/Photos\ Library.photoslibrary/

Note: while testing these commands, one of them made a “Resources” folder and a “.photoslibrary” file within the main .photoslibrary I was syncing over that I learned about here – this happened when I omitted a trailing / after .photosplibrary. Fortunately, deleting the Resources folder (it was empty anyway) moving the nested .photoslibrary document up one directory (and deleting the main one) fixed this mess and left me with a single .photoslibrary document that opens in Photos.app and can up updated using the command above a second time. Future updates seemed to be fast, finishing in less than 5 minutes and this on a mid-2015 13-inch MacBook Pro. If I have enterprising friends or family who want to store backups safely off-site, this could be a useful command. So glad this is working!

A few additional notes. It appears check sums are verified after the transfer completes. If for some reason you want to verify check sums before the transfer, append a “c” to “-Pha” to make “-Phac”.

Kevin talks about making a cron job out of this, but these days it will likely have to be launchd.

If we start messing around more with iCloud Photos, this script may be helpful.

Reducing PDF File Size

I seem to get into this more often than I need to. I was preparing a report this weekend that grew to ~500 pages and 80 MB in size. I wanted to transmit the report as a .pdf via email. Using services like OneDrive work, but they are annoying when they require an external user to verify who they are. I also tried reducing the file size with a few other options, including:

  1. PDFCompress, an old app on my Mac
  2. Preview, using it’s Export option
  3. Others I’m forgetting to list here

None of the options above produced a small enough .pdf file or at least not one that was less than 50 MB. Finally I turned to Ghostscript, but first I had to install and configure it:

1. Open Terminal.app and enter: brew install ghostscript
2. After Ghostscript installs, use Terminal to navigate to the folder containing your .pdf, in my case: ls ~Desktop
3. Insert this command into Terminal, replacing input.pdf and output.pdf with the file names you prefer:

gs -sDEVICE=pdfwrite -dPDFSETTINGS=/ebook -dNOPAUSE -dQUIET -dBATCH -sOutputFile="output.pdf" "input.pdf"

The above-command produced a file about 38 MB and I was able to get it down to 36 MB using the following command:

gs -q -dNOPAUSE -dBATCH -dSAFER -sDEVICE=pdfwrite -dCompatibilityLevel=1.4 -dPDFSETTINGS=/screen -dEmbedAllFonts=true -dSubsetFonts=true -dColorImageDownsampleType=/Bicubic -dColorImageResolution=144 -dGrayImageDownsampleType=/Bicubic -dGrayImageResolution=144 -dMonoImageDownsampleType=/Bicubic -dMonoImageResolution=144 -sOutputFile="output.pdf" "input.pdf"

I found these references helpful in developing this approach:
https://gist.github.com/ahmed-musallam/27de7d7c5ac68ecbd1ed65b6b48416f9
https://www.cisdem.com/resource/shrink-pdf-file-size-on-mac.html

Dyson DC17 Absolute Animal Repair

Our above-referenced vacuum wasn’t producing as much vacuum and we found that its filter was clogging faster. I figured portions of its cyclone, where air moves upward its path to ultimately reach the motor’s impellers and debris falls downward to the collection canister, had become blocked. While taking apart the cyclone, I published my journey here:

https://www.ifixit.com/Guide/Dyson+DC17+Cyclone+Cleaning/168779

After reassembling the cyclone and putting it back in the DC17 the vacuum cleaner is running like its brand-new again.

Node Upgrade with Brew

One of the Homebridge plugins was whining about “node” being out of date. Sure enough, when running this with Terminal:

node –version

Showed my Mac mini was running “v16….” and it needed to be upgraded to 20. Easy enough with brew:

brew install node@20
brew unlink node@16
brew link node@20 –force –overwrite
nano ~/.zshrc

In nano I edited the following line from:

export PATH=”/usr/local/opt/node@16/bin:$PATH”

to

export PATH=”/usr/local/opt/node@20/bin:$PATH”

Exit and save with:

Control (key) and X
Yes

Next I closed the Terminal window, opened a new Terminal window, and typed in:

node -v

Which now proudly says:

v20.9.0

Yes!