
Years ago, we used iGo adapters around my office and they seemed to work well. I found used iGo adapters readily available and cheap on eBay – it seems most people believe these adapters aren’t compatible or worth using with modern devices and computers. I picked up a couple on eBay and figured I’d rig them to work with my MacBooks, iPhones, and iPads.
A Juice 70 or an iGo auto/air85 worked with a MacBook Pro by connecting the A3 adapter (19 volts) A4 adapter (16.6 volts) to a couple additional items:
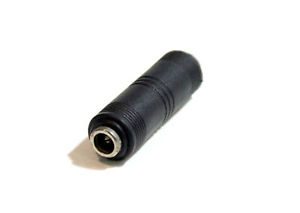
1. An adapter I found on eBay, a DC 5.5mm to 5.5 mm power plug coupler/extender/adapter (Female to Female):
http://www.ebay.com/itm/191164201422
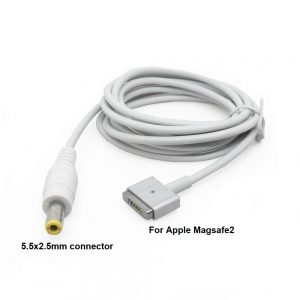
2. A MagSafe to 5.5 mm DC adapter cable from Amazon (MagSafe2 is shown in photo below):
http://www.amazon.com/gp/product/B00JQ5F0ZU
I plugged the iGo’s and cables into two vehicles and they all seem to work fine.
I was also able to get an iPad 2 charging with the legacy iPod adapter (iGo A61 adapter) connected to the iGo dual power accessory, but I think it was limited to 500 ma for charging.
I also tried to attach an iPhone 6s and iPad 4 to the iGo dualpower accessory using an iGo A46 adapter and a Lightning USB cable, but neither would charge.
I’m curious what else I can power up with these iGo power adapters. iGo only said what devices their tips could power up, but the voltages were never attached. If anyone has a complete list of voltages for all the tips, I’d love to see it. In the interim, I’m developing my own list and I invite you to contribute to it:
https://docs.google.com/spreadsheets/d/1FqNx8Fy8wYQG7PRS7hv3gnOUO2JoffU4k5_uDDIRO9w/edit?usp=sharing