While running like a headless champion better than 99% of the time, I tried connecting a Mac mini (mid 2011) to an iPad 2 with Duet Display last night. After trying this, Duet Display didn’t project the display from the Mac mini to the iPad and, while viewing the connection over VNC, the Mac mini slowly became unresponsive and restarts didn’t help. Even after a couple restarts, the Mac mini was unreachable.
Putting the mini in Target Disk Mode and booting its system volume through a MacBook Pro allowed OS X to boot and I could view the screen, but when booting OS X on the mini alone, it failed to establish a network connection. Resetting the SMC and PRAM failed to help. After finding another display to attach (thanks, Mom and Dad!), the mini booted up and connected with AirPort, but the ethernet card wasn’t detected by OS X – as observed through About this Mac->System Report…->Ethernet Cards, the mini only said “This computer does not appear to have any pci ethernet cards installed”. Deleting the Ethernet port in Network Settings and rebooting only seemed to make things worse, as the Ethernet port couldn’t be added back through Network Settings.
Many reports on the web indicate that the NetworkInterfaces.plist and other files should be trashed, but I was worried that possibly other files were corrupted too. Rather than play roulette with plist files, I took the easy way out – I allowed OS X to reinstall itself while I slept. After doing this and revisiting “System information”, the Ethernet port shows it is in now recognized:
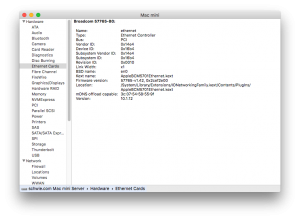
Fixed!