Early versions of Visual Sample Plan were not supported on the Mac, but I’ve used wineBottler with success in the past, so I set out to test it with VSP 7.9 on my Mac. The following steps should work on a Mac running macOS Sierra (10.12.6):
- Download wineBottler and install it and the bundled wine in your Applications folder.
- Download the latest version of VSP to the Downloads in your home directory/folder.
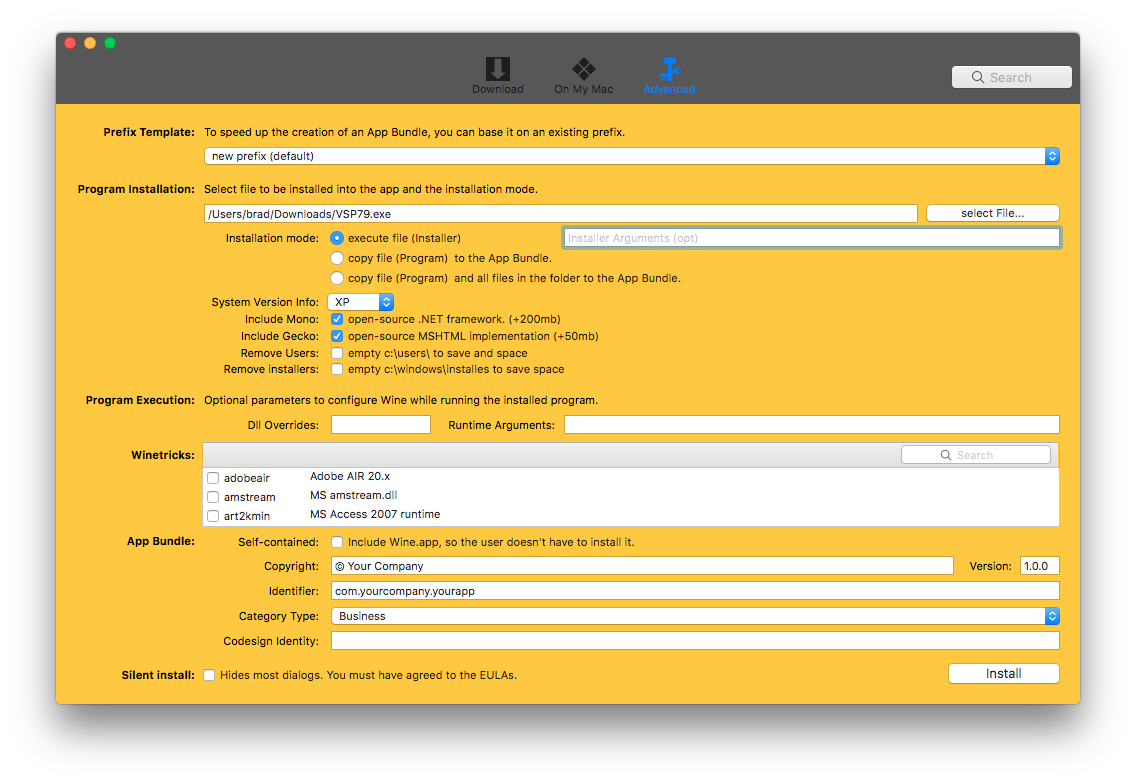
- Open the wineBottler application, click the “Advanced” button, and configure it as shown in the screenshot below:
- Click “Install” and then click “Next” whenever prompted by the Windows installer.
- The installer should run for a few minutes and you’ll need to click “Next” or “Agree” whenever prompted.
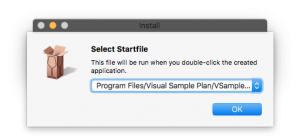
- Near the end of the installation process, you’ll be prompted to select a Startfile. The default, selected option is incorrect – you’ll need to click the file path drop down menu, select the option for “Program Files/Visual Sample Plan/VSample.exe”, and click OK, as shown below:
- After doing this, you should reach the dialog/prompt “Prefix created successfully” and then click OK.
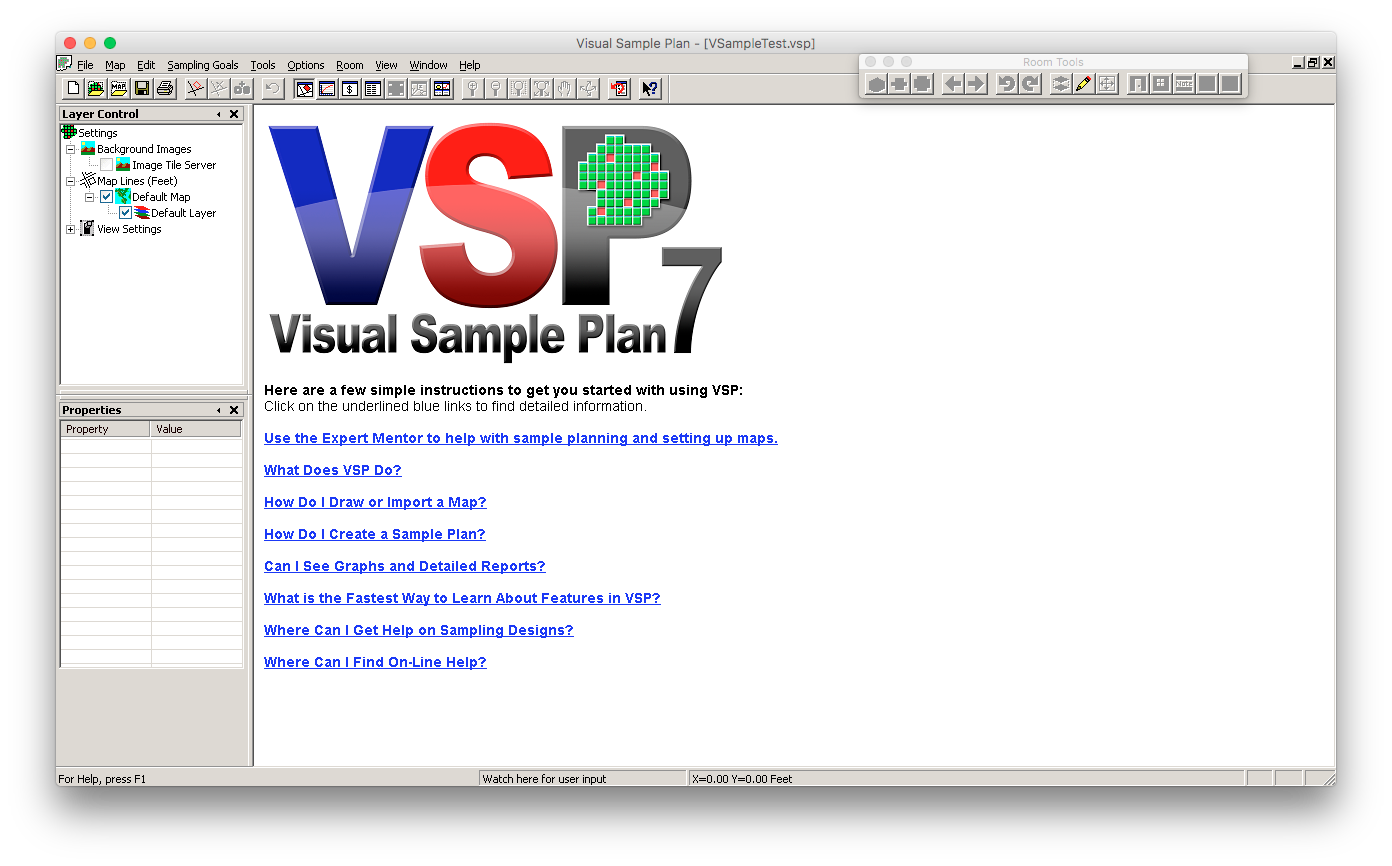
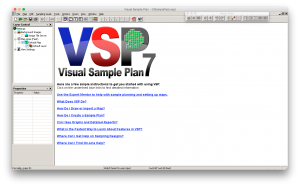
- To run the newly created application, search for “Visual Sample Plan 7.9” on your machine and launch it – should be inside your Applications folder and you should see something like below:
- Bonus step – on my machine, I launched Visual Sample Plan and noticed its icon in the Dock is generic, even though the VSP icon for the application in the Applications folder has the green and red grid. To fix this, I selected the icon for VSP in the applications folder, pressed command-C, command-I, clicked the icon in the Get Info window, and command-V to paste in the icon. Make sure you do this when the application is not running.